/DIY: Rainbow Book Tutorial
Written by Marenne on June 7th, 2014 | no comments
This is a tutorial on how to make a notebook with a binding specified as “long stitch though a slotted spine with woven cover”. I prefer to just call it “woven long stitch”.
Tools & Materials
You’re going to need (bare minimum):
- Paper or a notebook. Paper can be whatever you want, as long as it can be folded and doesn’t break apart easily. The notebook can be the cheapest. Composition notebooks are fine as well. It just needs signatures.
- Card stock. About 250-300 g/m2 (12-14 pt, 90-100 lb.) Not too thin, because you don’t want the hinge too break, not too thick, because you need to fold it to form the hinge.
- String. Regular cotton/linnen is best. But wool or synthetics can also be used. Just pick what you like, as long as it’s not too thick for a regular needle, or so thin that it will tear your paper (like regular sewing string would.)
- Glue or double sided tape(roller). As long as it not water-based/wet. PVC/bookbinding/wood glue is perfect.
- Tools: A needle, scissors, exacto knife, a ruler, a pen or pencil.
Step 1: the making of the signatures
From paper: follow A.
From a spare notebook: follow B.

Fold papers in half. If you have a bonefolder, use it. If not, use your fingers or scissors to make a sharp fold.
If you have a good paper cutter and will cut the signatures to the right size later on you don’t have to be really precise with folding. You can also fold several sheets in one go.
If you don’t have a paper cutter, precut the papers (if they’re not the right size already) and fold them one by one, as precise as you can.

The amount of paper in a signature depends on the paperweight. When using printerpaper (80 or 90 grms), I usually fold 8 papers (that’s 32 pages) per signature.
Put the folded paper into each-other until you have 6 (or more) signatures.
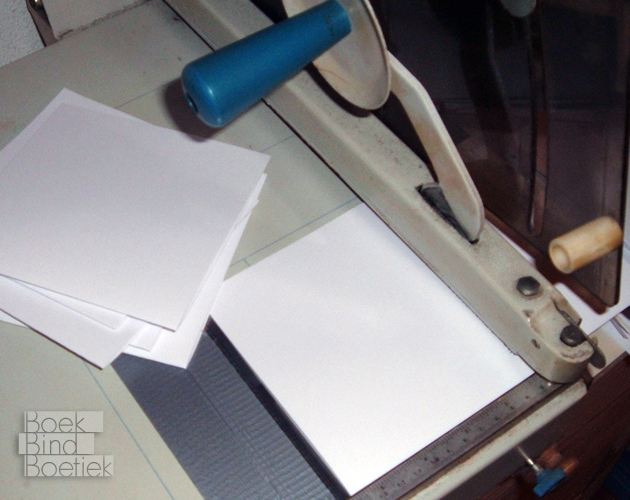
(optional) If you have a cutting machine you can now cut the signatures to the right size.
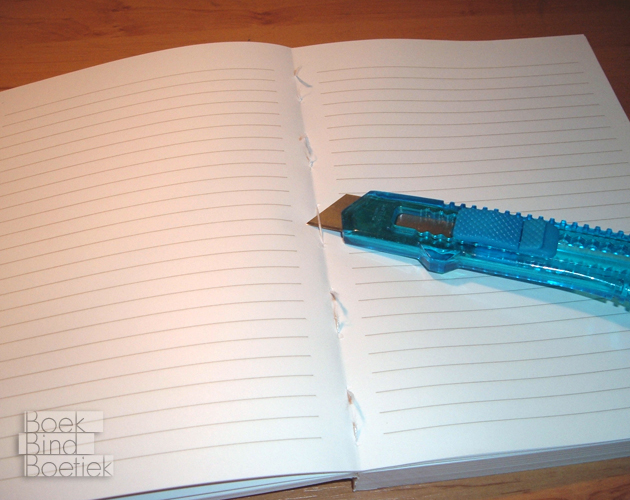
Use a notebook with signatures (not glued or wirebound loose papers). Open the notebook in the middle of a signature and cut the threads.
The first and last pages of signatures are glued together. Leave this paper and just take out the middle papers of the signatures.

(optional) If you have a paper cutter, cut the signatures to the right size. Mine were slightly asymmetrical, so I corrected that.
Step 2: 3 ways of piercing holes
You can skip this step if you’ve taken your signatures out of a spare notebook.
When punching your own holes, the location and spacing of the holes is your choice. An easy way to figure this out is to take the width of the signatures and divide it (for this binding) by an uneven number.

Make a guide from a piece of cardboard. It should be the same width as your signatures. Cut out little triangles where you want the holes to go. Draw an arrow to remember what side should always line up with one side of the signatures. Hold your signatures like in the graphic and punch the needle through the paper as drawn.
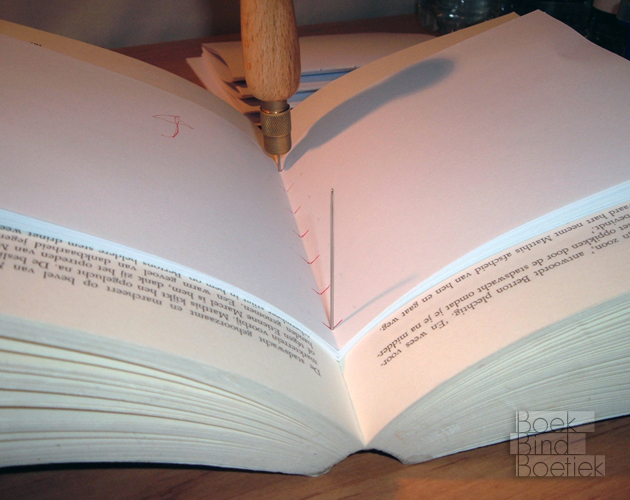
Use an old thick book (phonebook?) you’ve got no use for anymore (this will ruin the book). Make a guide out of a piece of paper the same size of your signatures. Punch through the signatures with an awl or a needle (careful with your fingers!) like in the photo.

Use a signature punching tool and awl. Use a piece of paper the size of your signatures to make a guide.
Step 3: Making the paper strips.

Measure the distance between the holes. Keep in mind that there needs to be space for the string, so don’t include the holes while measuring.

Now cut paper into strips the widths you just measured. The length of the strips should be twice the width of the signatures plus the thickness of all the signatures combined, and preferably some extra.
Step 4: Sewing the signatures.
NB! This description only works if your signatures have an even amount of holes (and thus will get an uneven amount of stips in the cover, like mentioned above.)
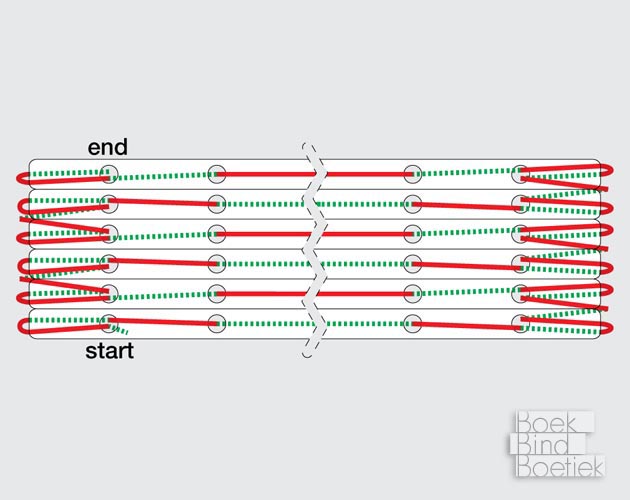
You can follow this diagram or the descriptions or both.
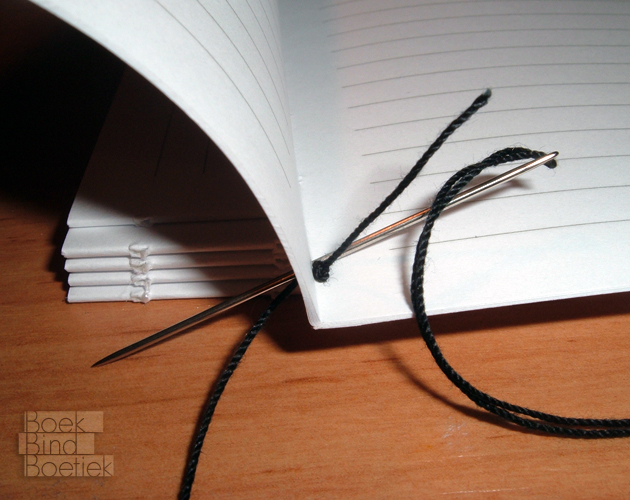
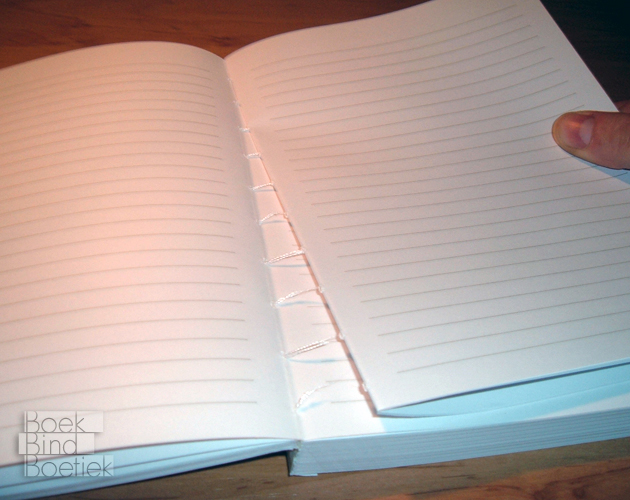
Get a piece of string. It should be the length of all your signatures added up plus some extra. Make a knot at the end of the string and start sewing from the inside of the first signature. Loop the string around and go through the same hole again, like in the picture. Now go up and down through the other holes.
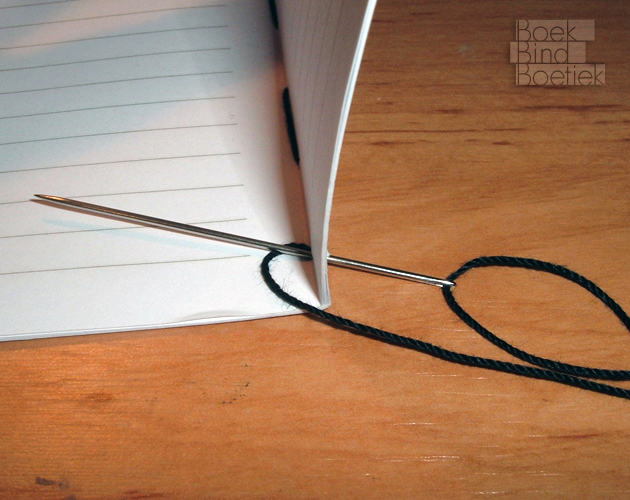
Loop the string around the signature again, like in the picture. Your string is now on the inside of your signature.
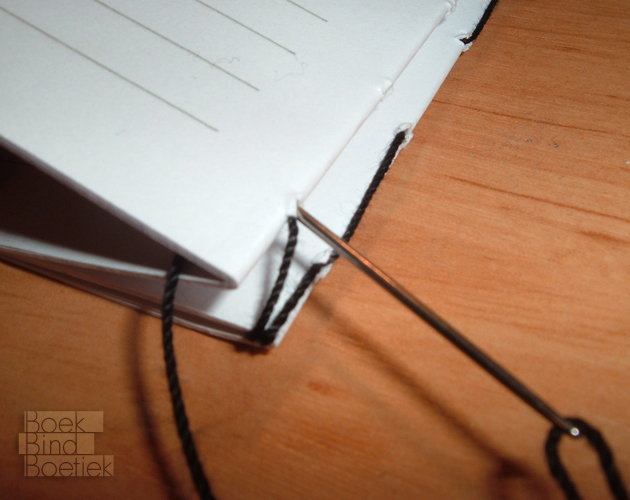
Go from the outside to the inside of the first hole of the second signature, and loop around, like before. Continue sewing up and down like before until the end of the second signature. Loop once more. Your string should now be on the outside of your second signature.
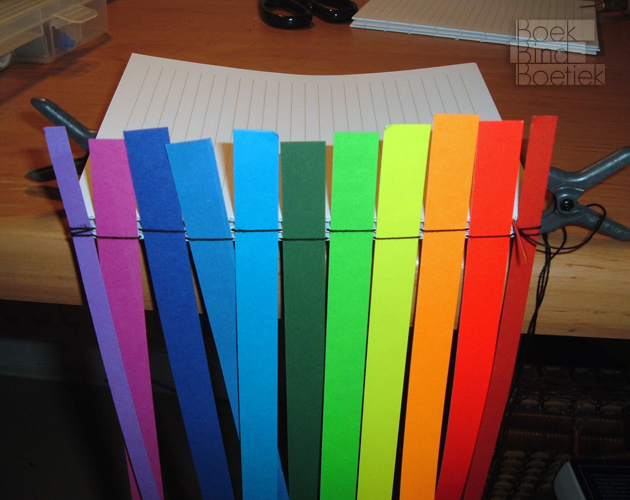
Now it’s time to weave the paper strips in between the sewing and the signatures. Its helpful to keep the signatures together with some kind of clip. Don’t pull the strips all the way to the middle, because they might fold during sewing.

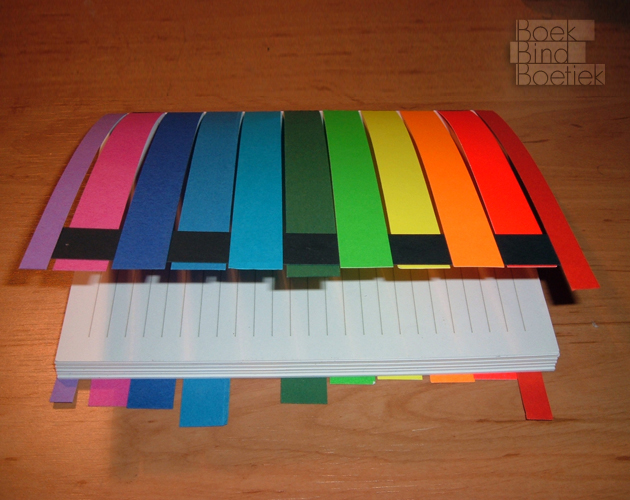
Now sew all the other signatures onto the strips. Follow the diagram above. If you have trouble holding everything together, try hanging it from a table. Also, keep using clips to tighten everything. I always go over the sewing once more to make sure it is very tight. Now finish the sewing with a knot (and a little bit of glue) and pull the strips all the way to the middle.
Step 5: Making the covers.

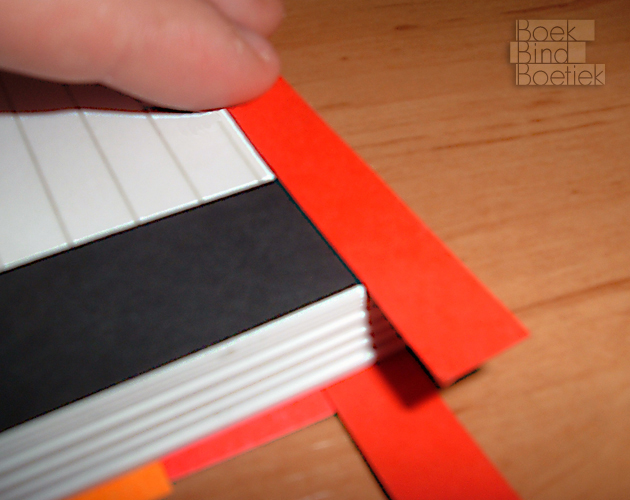
Make sure that the signatures are in the middle of the strips and the ends on both sides are long enough to cover the whole width of the signature. Then fold the strips to form the spine, like in the photo.

Cut more paper strips. Determine the width of these strips by dividing the width of the signatures by some number. The length of these strips should be longer than the length of the signatures. Take one of the strips and make it exactly as long as the signatures.
Attach the top and bottom horizontal strips to the vertical strip you just cut to size. Make sure that all the sides are level to the signatures. Use either PVC glue or double sided tape (roller). No wet glue or paste.
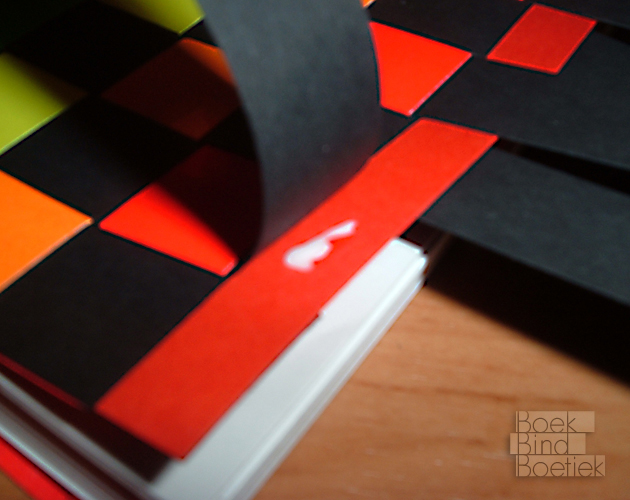
Now, attach the other horizontal strips to the vertical strip, alternating between the vertical strips top and bottom, like in the picture, and cut of the excess of the horizontal strips.

Start weaving in the other vertical strips.

It’s best to let the last strip be in the middle. If you’re having trouble with the last strip, fold the end and push that piece through bit by bit.

In the end, your weaving might look like this.
Attach the vertical strips to the top and bottom horizontal strips and cut of the excess.

Turn over and repeat step 2 through 8. Your journal is now finished!
You might also like:
The following porfolio projects are linked to this post:
